As the digital landscape evolves, animations have become integral to web design, enhancing user engagement, and clarifying concepts through dynamic visuals.
Bodymovin emerges as a pivotal plugin, allowing designers to transmute Adobe After Effects animations into the versatile JSON format. If you are a designer or developer aiming to integrate smooth, scalable animations into your websites or apps, you are in the right place.
In this step-by-step guide, you will dive deeply into the world of Bodymovin—a popular After Effects plugin that exports your animations as JSON files. I will show you how to seamlessly create, refine, and implement these animations into your projects.
Understanding Bodymovin
Developed by Hernan Torrisi in 2015, Bodymovin is an Adobe After Effects plugin that allows you to export your animations as JSON files—a lightweight data interchange format.
This tool is designed to support a wide array of After Effects features, facilitating the integration of animations into web and mobile interfaces.
Why opt for JSON?
JSON-formatted animations offer several advantages over traditional GIFs and PNG sequences. Significantly smaller in file size, they contribute to faster website loading times while maintaining crisp visuals at any resolution, courtesy of vector-based graphics.
JSON’s interactivity and editability allow developers to effortlessly modify elements such as color and text without returning to After Effects, paving the way for customizable animations that captivate users.
JSON is different from GIFs, but any JSON can be converted to GIFs with the help of a simple tool of LottieFiles which is called Lottie to GIF
Creating JSON Animations with Bodymovin
To begin, you must have a basic understanding of Adobe After Effects. This free plugin makes it easy to transform your artistic animations to JSON. Let us dive in.
You can download Bodymovin for After Effects for free directly from Creative Cloud application on Windows or MAC. Search for it in the plugin section of Creative Cloud and you will find it there, or you can download it from here.
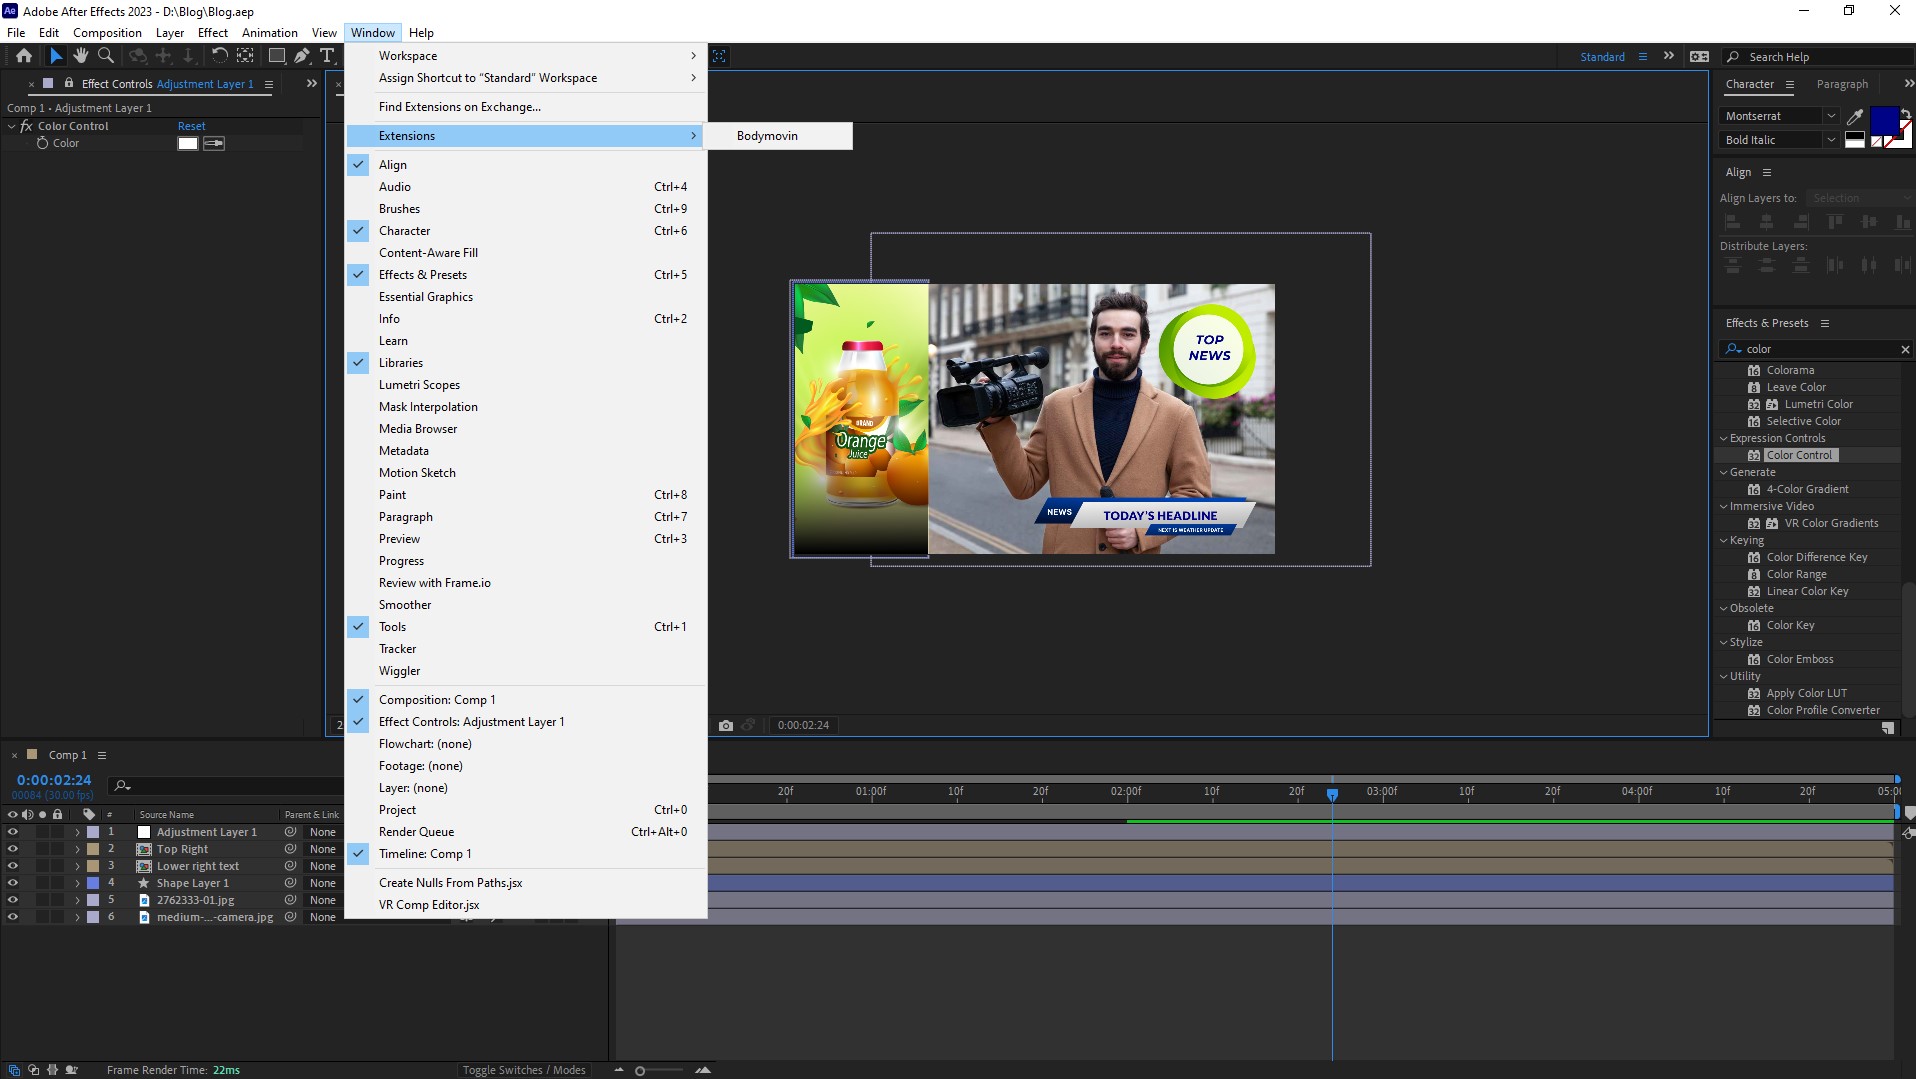
Step 1: Open the Extension
Launch Adobe After Effects, complete your animation, and navigate to the “Window” menu. Choose “Extensions” and select “Bodymovin” from the dropdown to open the plugin.
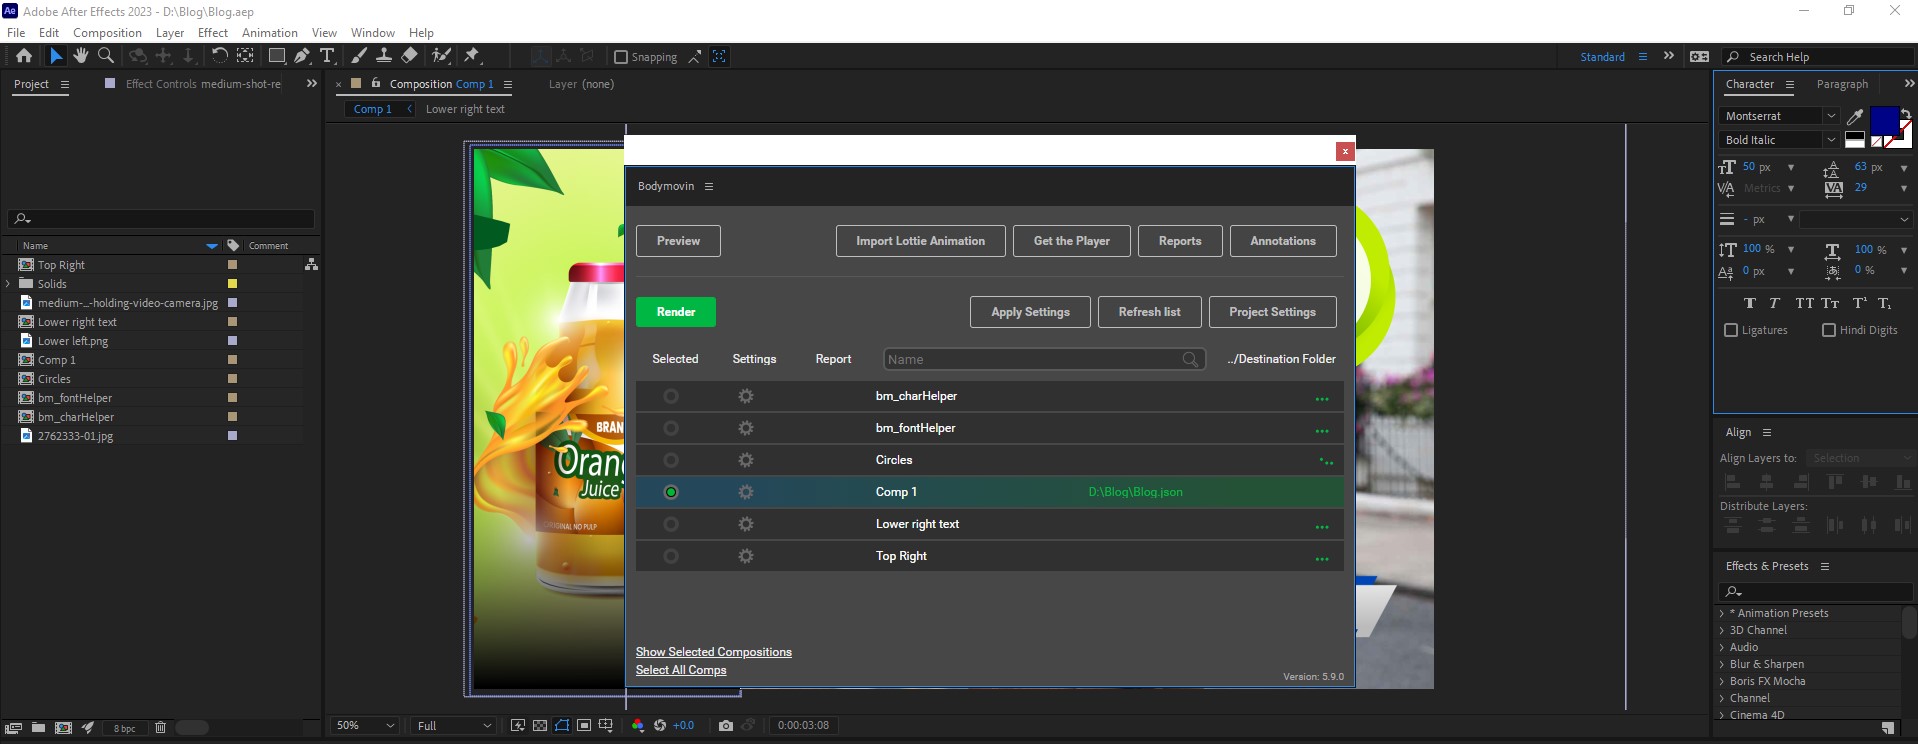
Step 2: Select the Animation
In the Bodymovin interface, pick the composition you aim to export as JSON. On the right, click on the menu icon to set your desired location to save the JSON file. Customize your output by clicking on the settings icon.
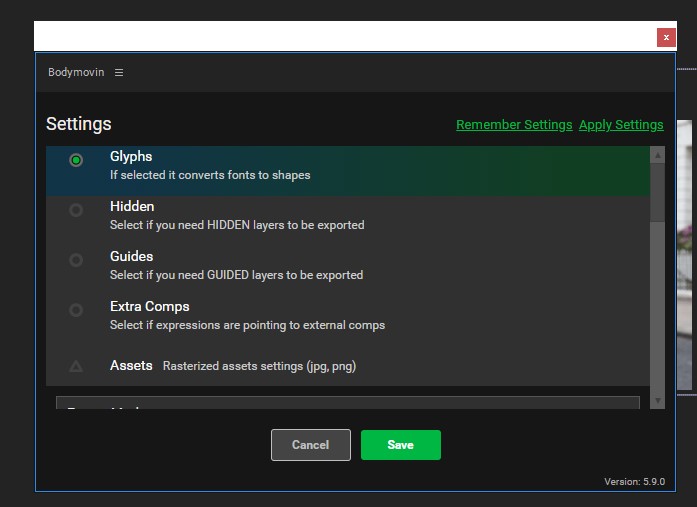
Step 3: Modify Project Settings
Tailor the export settings to align with your project’s needs and use Remember Settings to keep the present modifications for future conversions.
Step 4: Render the JSON File
Save your configurations, then hit “Render” in the subsequent window. Your JSON file will now be saved in the chosen directory.
Step 5: Test the JSON File
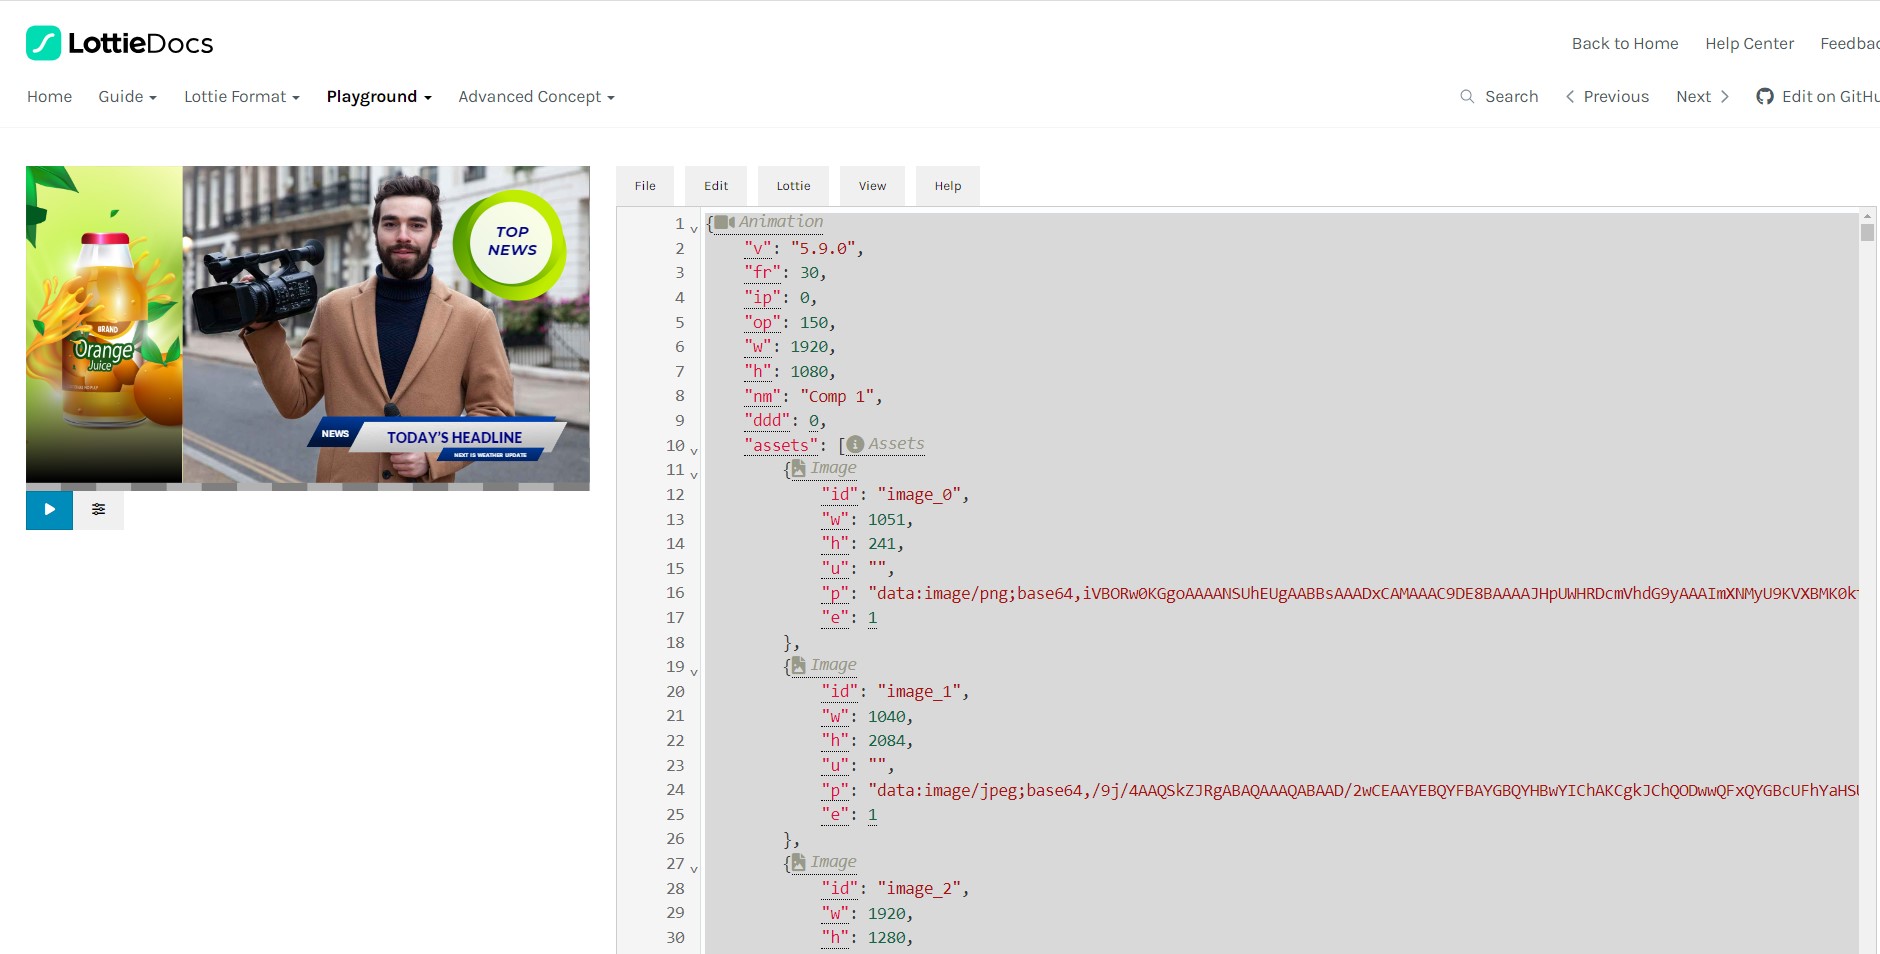
Use this website to verify that your freshly produced JSON works as intended. In the code area, drag and drop your file, and you should see the animation begin to play.
Step 6: Code Adjustments
This platform allows real-time code adjustments affecting the animation. In the coding panel to the right, you can modify code to customize shape colors, adjust the text formatting, and edit the text content.
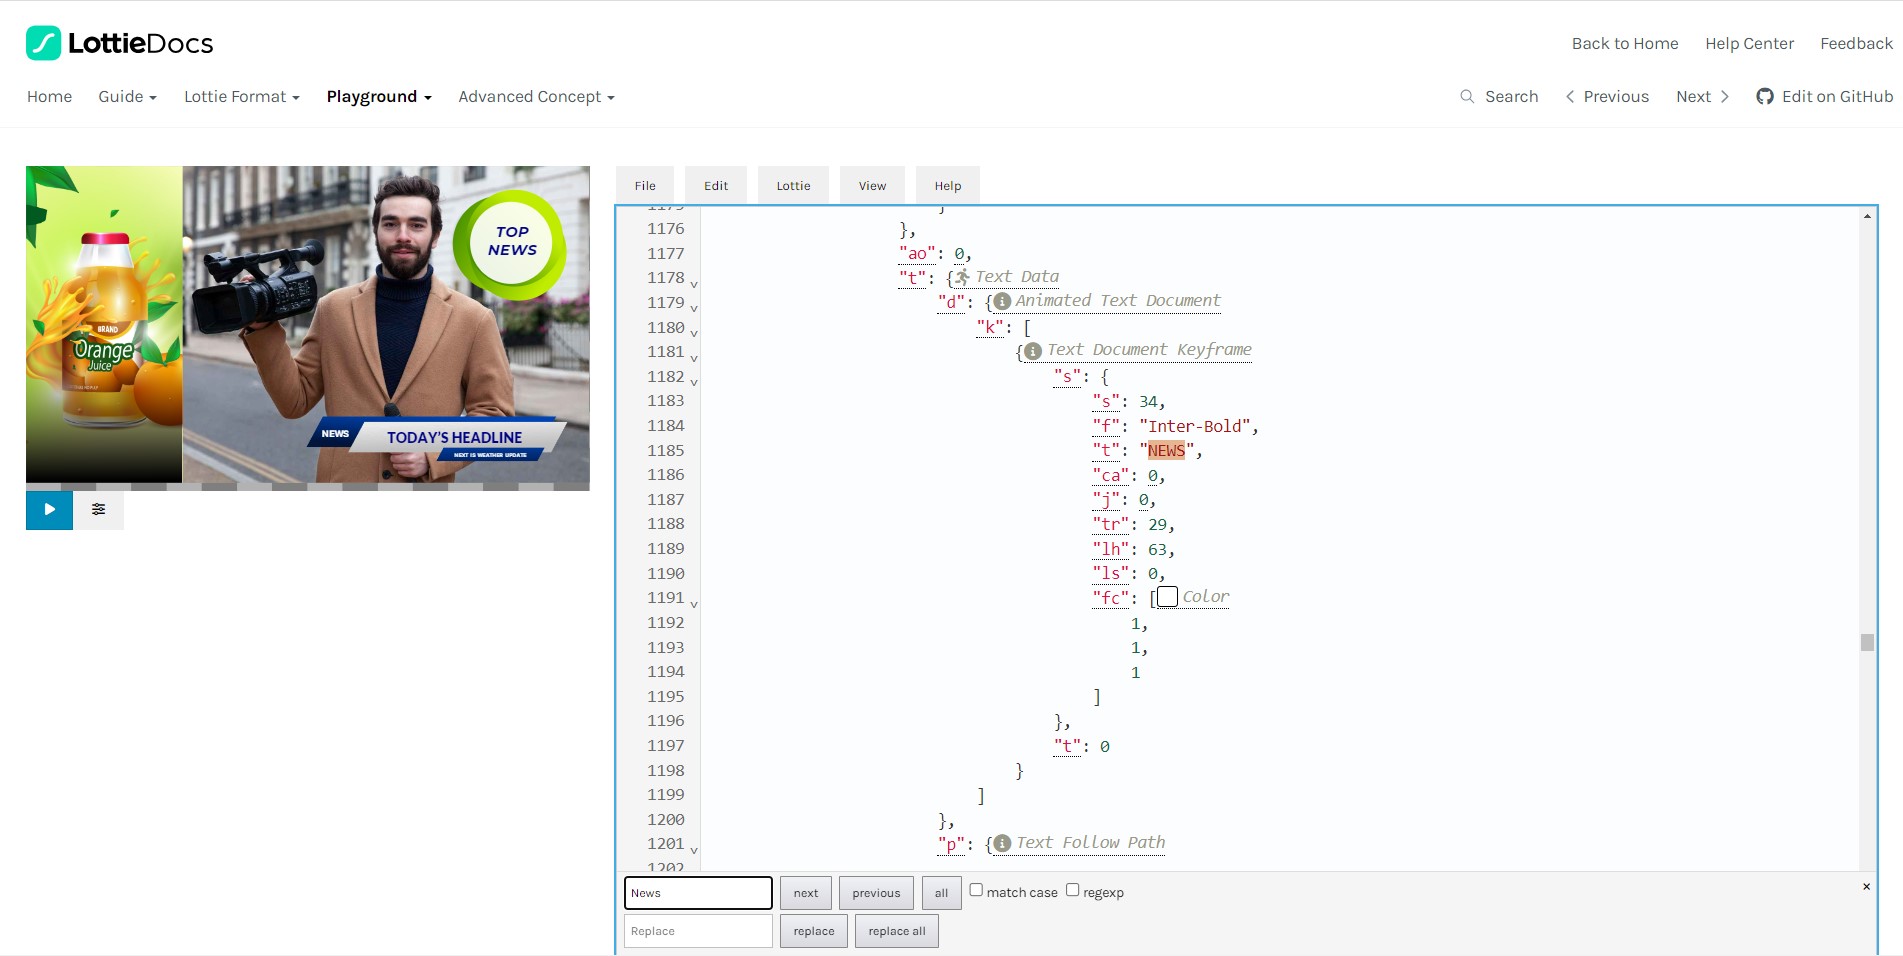
Type “NEWS” into the finder window after pressing CTRL+F to see where it is being used.
Step 7: Change Text in the Animation
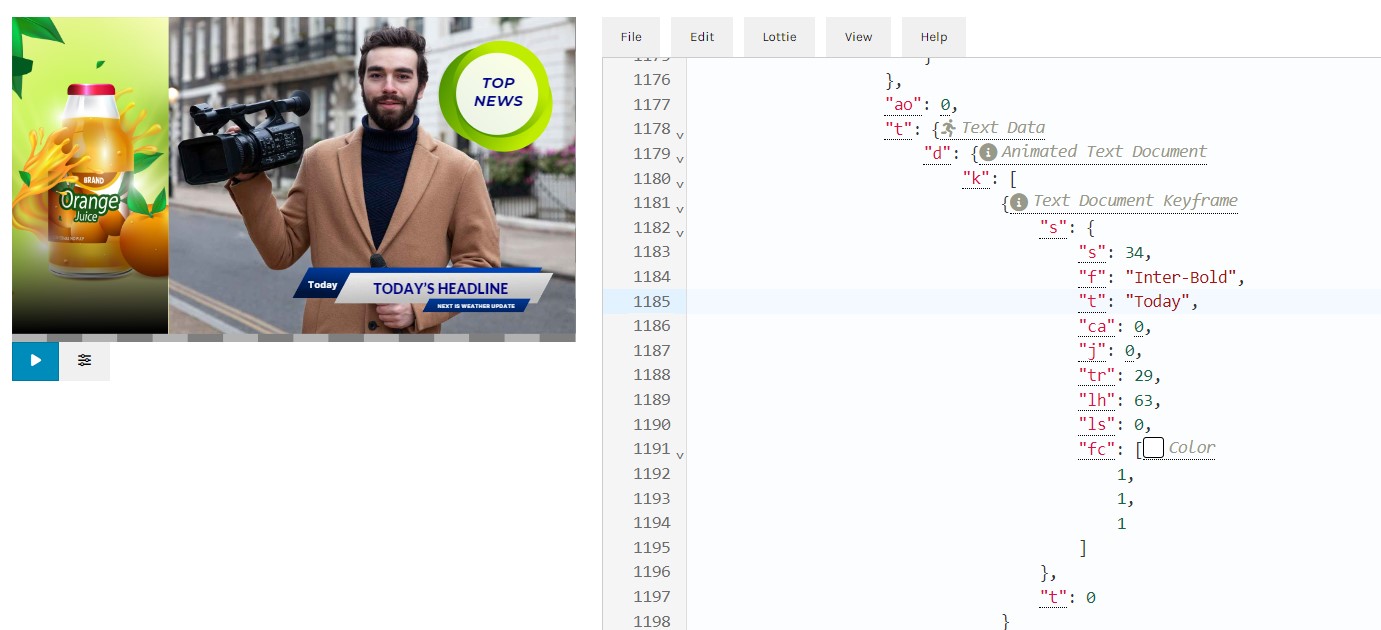
Now you can customize the text as desired, and it will automatically update within the animation. I have updated the date to “Today,” and the corresponding text has been modified accordingly.
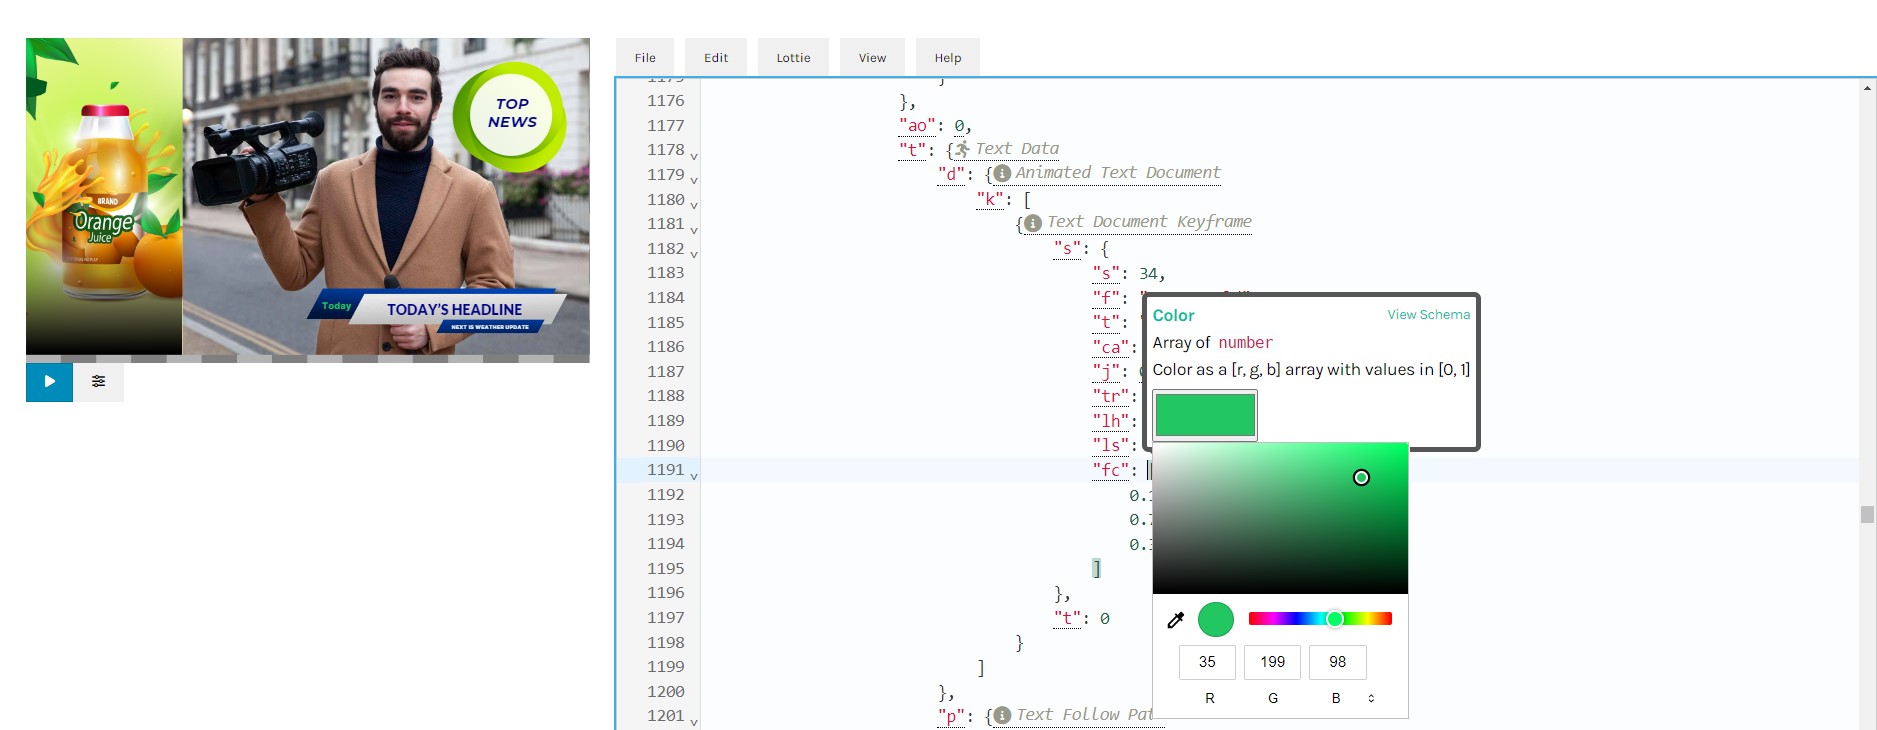
You can further customize the text color in the code’s designated color section below.
There are plenty of animation possibilities when working with JSON. However, there are also certain restrictions. We are aware that Bodymovin is unable to convert a large number of effects and presets in “Adobe After Effects” to JSON. So, it is best to avoid using the built-in effects and presets.
Potential Errors You Could Experience
The following render failed error could appear when you use Bodymovin for the first time:
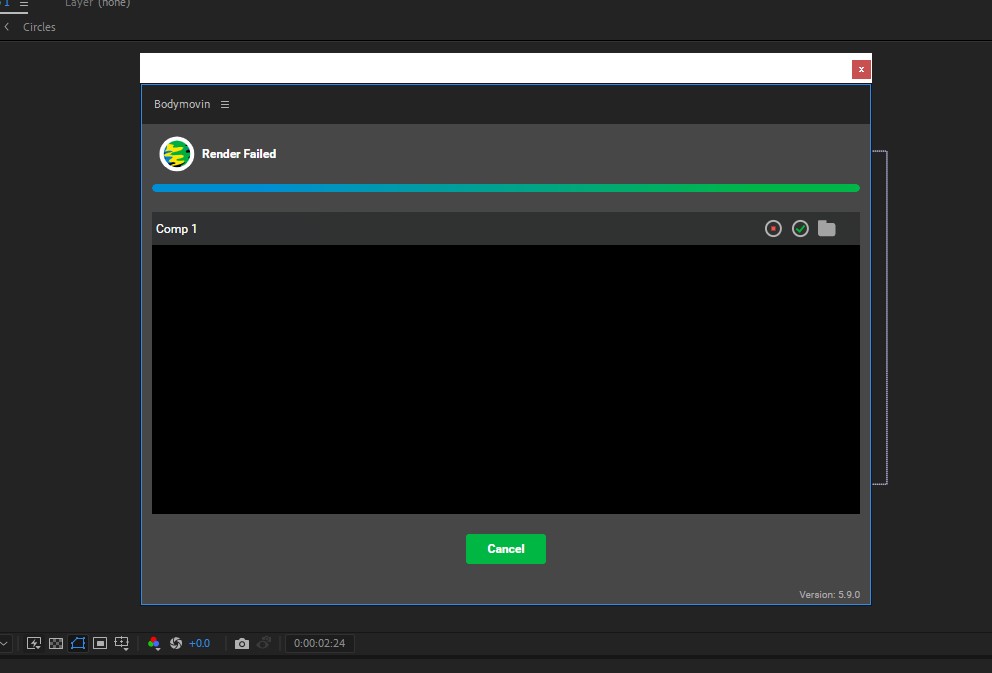
To resolve this, you can do the following quick action:
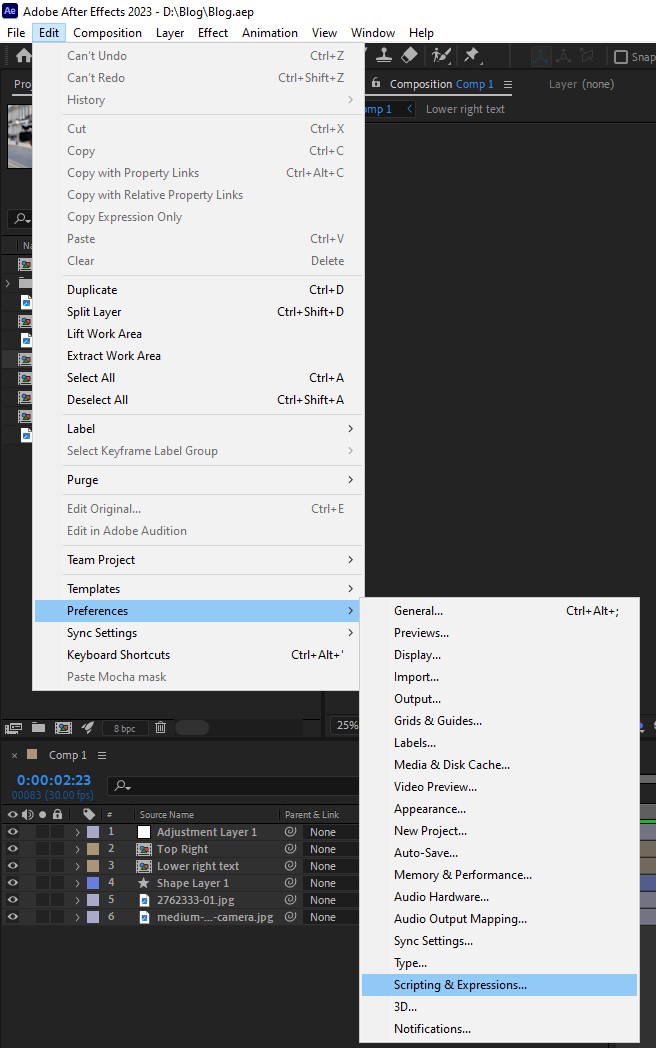
1. Going to “Edit > Preferences > Scripting & Expressions”.
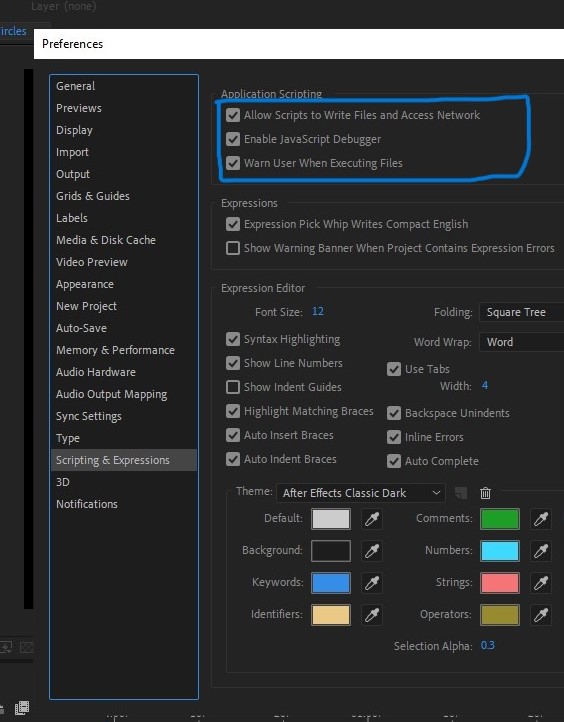
2. Enabling both “Allow Scripts to Write Files and Access Network” and “Enable JavaScript Debugger”.
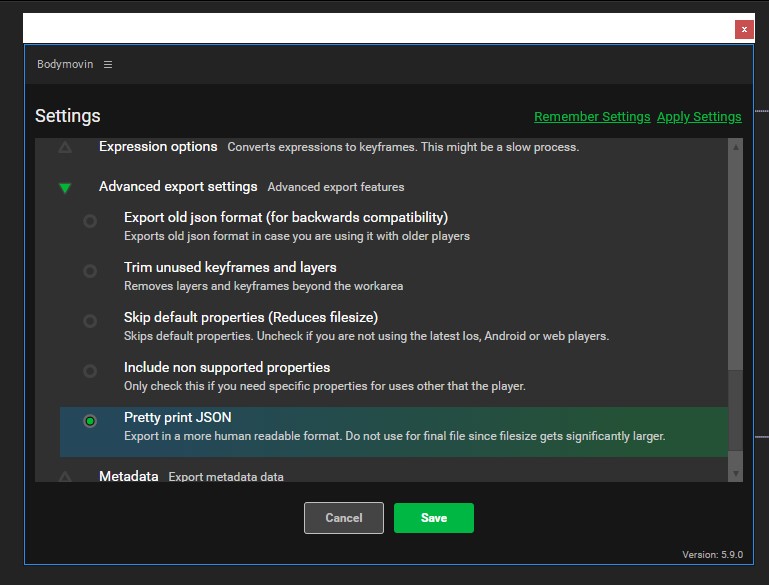
I would also like you to change some other settings in Bodymovin plug-in:
- Uncheck the Glyphs option and it will help to store the fonts you want to change.
- Check the “Pretty print JSON” and that will help to prettify the JSON.
Wrapping Things Up
The Bodymovin plugin efficiently bridges “Adobe After Effects” and interactive web animations through its adept JSON conversion capability. The plugin empowers both developers and designers by meeting individual project requirements with its configurable parameters.
Moreover, if you Simplify dynamic animations in your React app. Say goodbye to complex code or css and hello to smoother, hassle-free animations with JSON code. Check After Effects animation in React using Lottie.
To dive deeper into Bodymovin’s functionalities, refer to the official documentation and explore our blog page for more tech insights and tutorials.
Add a Comment