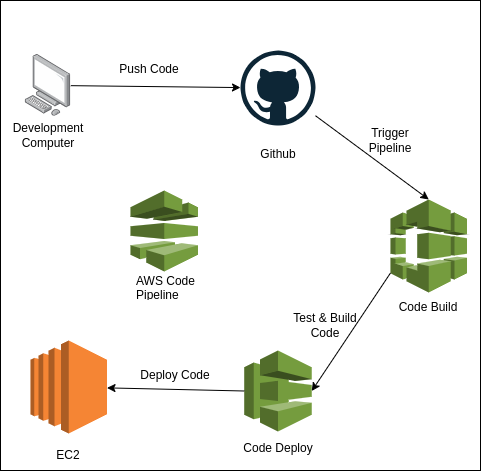
For frequent software delivery, it is important to deliver small changes to the production environment and be able to fix or roll back in case a feature breaks. In this context, CI/CD is crucial. This article will demonstrate implementing CI/CD for a small Node.js application. We will deploy the code to an EC2 instance and ensure that any changes in the codebase trigger the code pipeline to run the code build. Upon successful build, the code will be deployed to the EC2 instances using CodeDeploy.
The configuration is designed to be highly scalable, allowing you to extend every lifecycle hook based on your preferences offered by AWS. Although we are deploying the code to a single EC2 instance, by making a few configuration adjustments in CodeDeploy, we can utilize a load balancer and deploy the code to multiple instances simultaneously. Here, we are using in-place deployment, but simply by switching a radio button, you can opt for blue-green deployment.
AWS Code Pipeline
AWS CodePipeline orchestrates several CI/CD tools. These tools include a code repository (such as S3, CodeCommit, GitHub, etc.), build tools (like Jenkins or CodeBuild), and code deployment tools. We can use CodePipeline to build and deploy the code from our repository to EC2 instances, AWS Beanstalk, Lambda, or even our on-premise servers.
Prerequisite
Before we proceed further, this article requires some degree of knowledge regarding the AWS ecosystem, including EC2 and IAM services. You must understand the overall idea of the continuous integration and continuous deployment process (CI/CD).
Our steps will be:
- Create the necessary IAM roles.
- Create an EC2 instance (or many based on your use case).
- Update the application code with the necessary configurations. I am providing one.
- Create a CodeBuild application.
- Create a CodeDeploy application.
- Create the CodePipeline.
- Few troubleshooting steps.
IAM Role
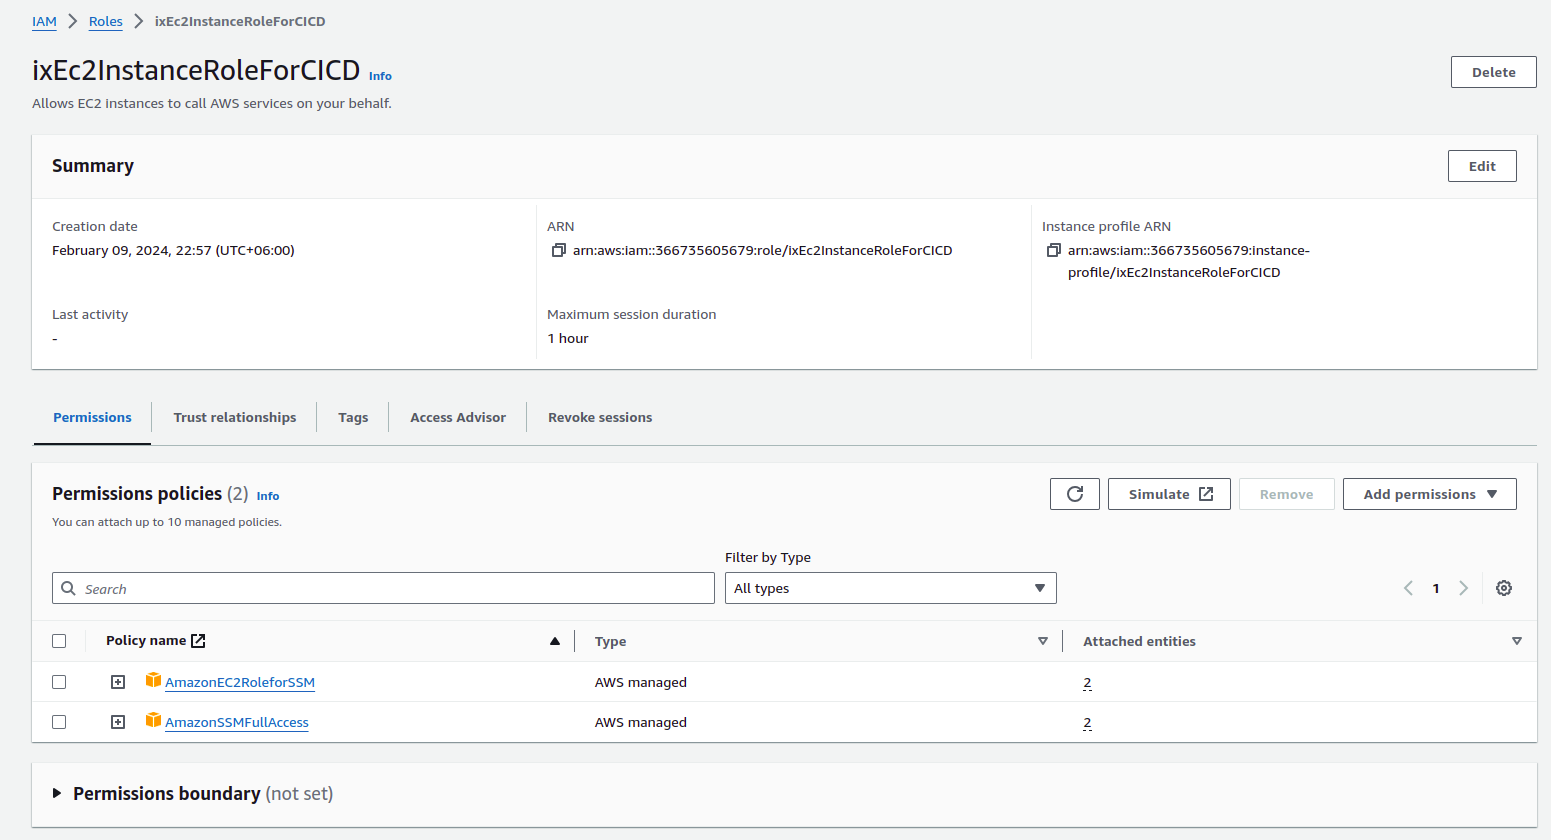
EC2 Instance Role
The EC2 instances will install the CodeDeploy agent and update the tool over time. The attached IAM role to the instance should have the following permissions:
- AmazonEC2RoleforSSM (AWS Managed)
- AmazonSSMFullAccess (AWS Managed)
To create the role:
- Go to
IAM -> Roles -> Create Role -> AWS Service. - As
Service or use case, selectEC2. - Add the mentioned roles and save.
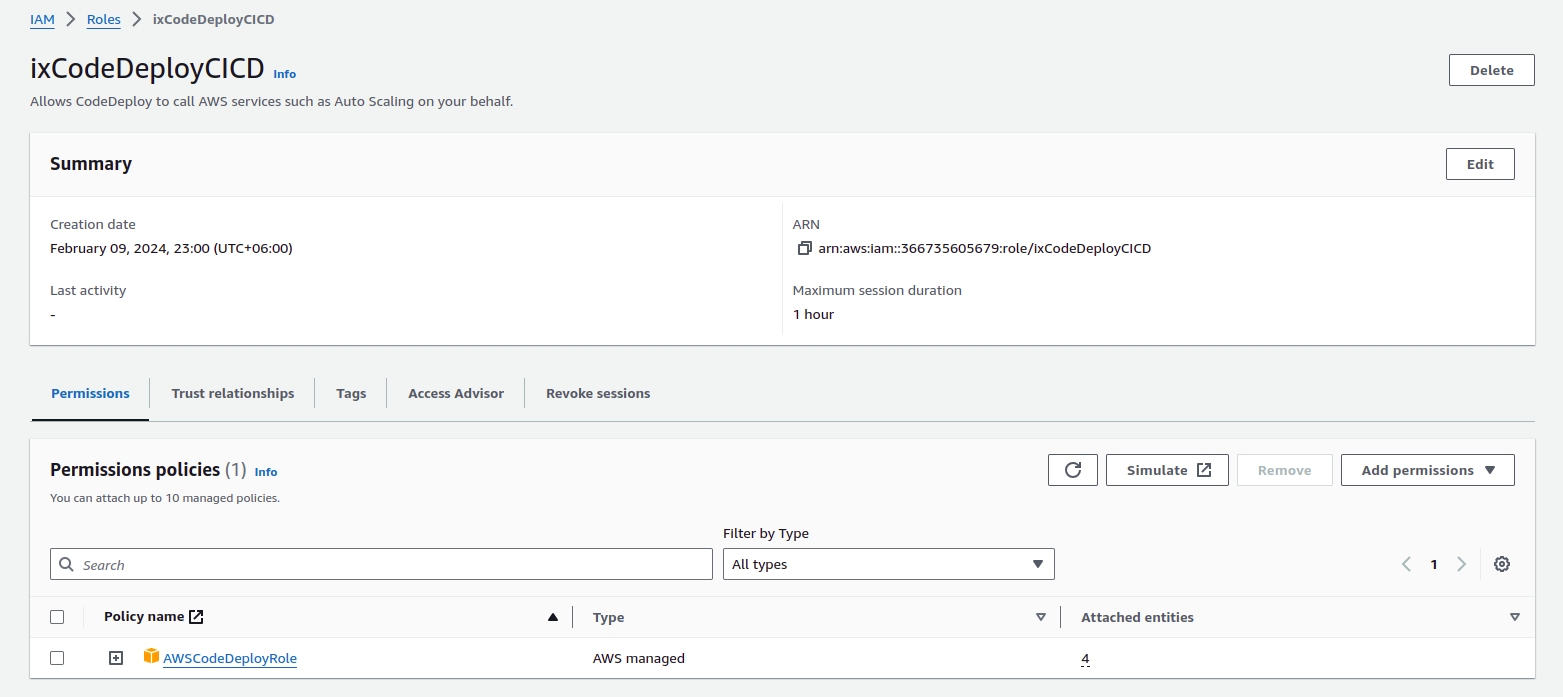
Code Deploy Role
To deploy the code to the EC2 instance, the IAM Role for CodeDeploy should have the following permissions:
- AWSCodeDeployRole (AWS Managed)
Again, to create the role:
- Go to
IAM -> Roles -> Create Role -> AWS Service. - As
Service or use case, selectCodeDeploy. - Add the mentioned role and save.
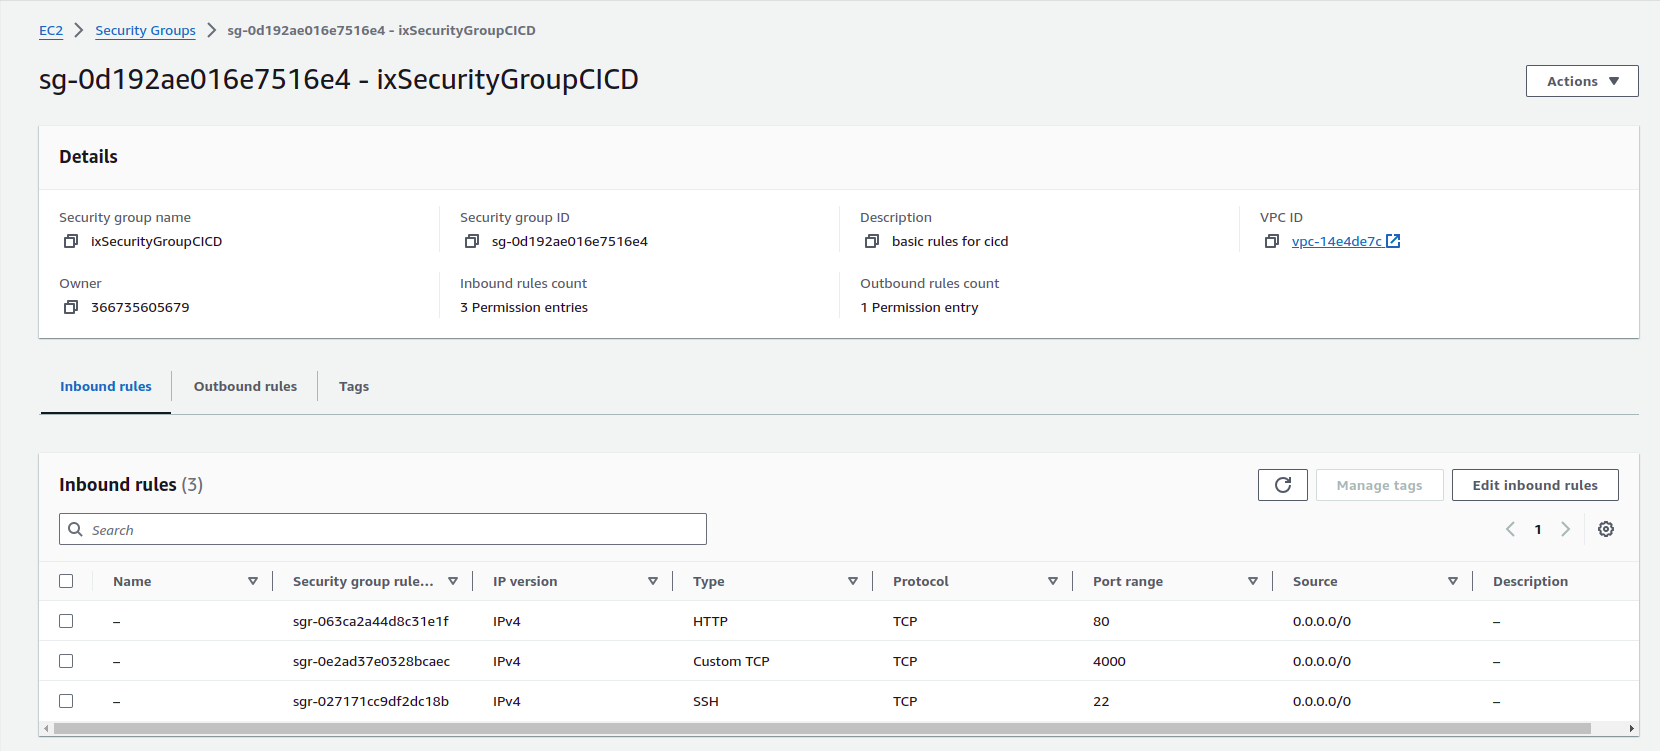
EC2 Instance Security Group
The Security Group for the EC2 Instance:
- should open port 22 for SSH
- should open the Node.js server port for traffic
- should open HTTPS as we download the CodeDeploy agent on our instance
- should open HTTP for server HTTP traffic until SSL Certificate is installed
To create a security group:
- Select search and open EC2 section.
- From the left navbar, select the
Security Group. - Create a security group with the inbound rules mentioned above.
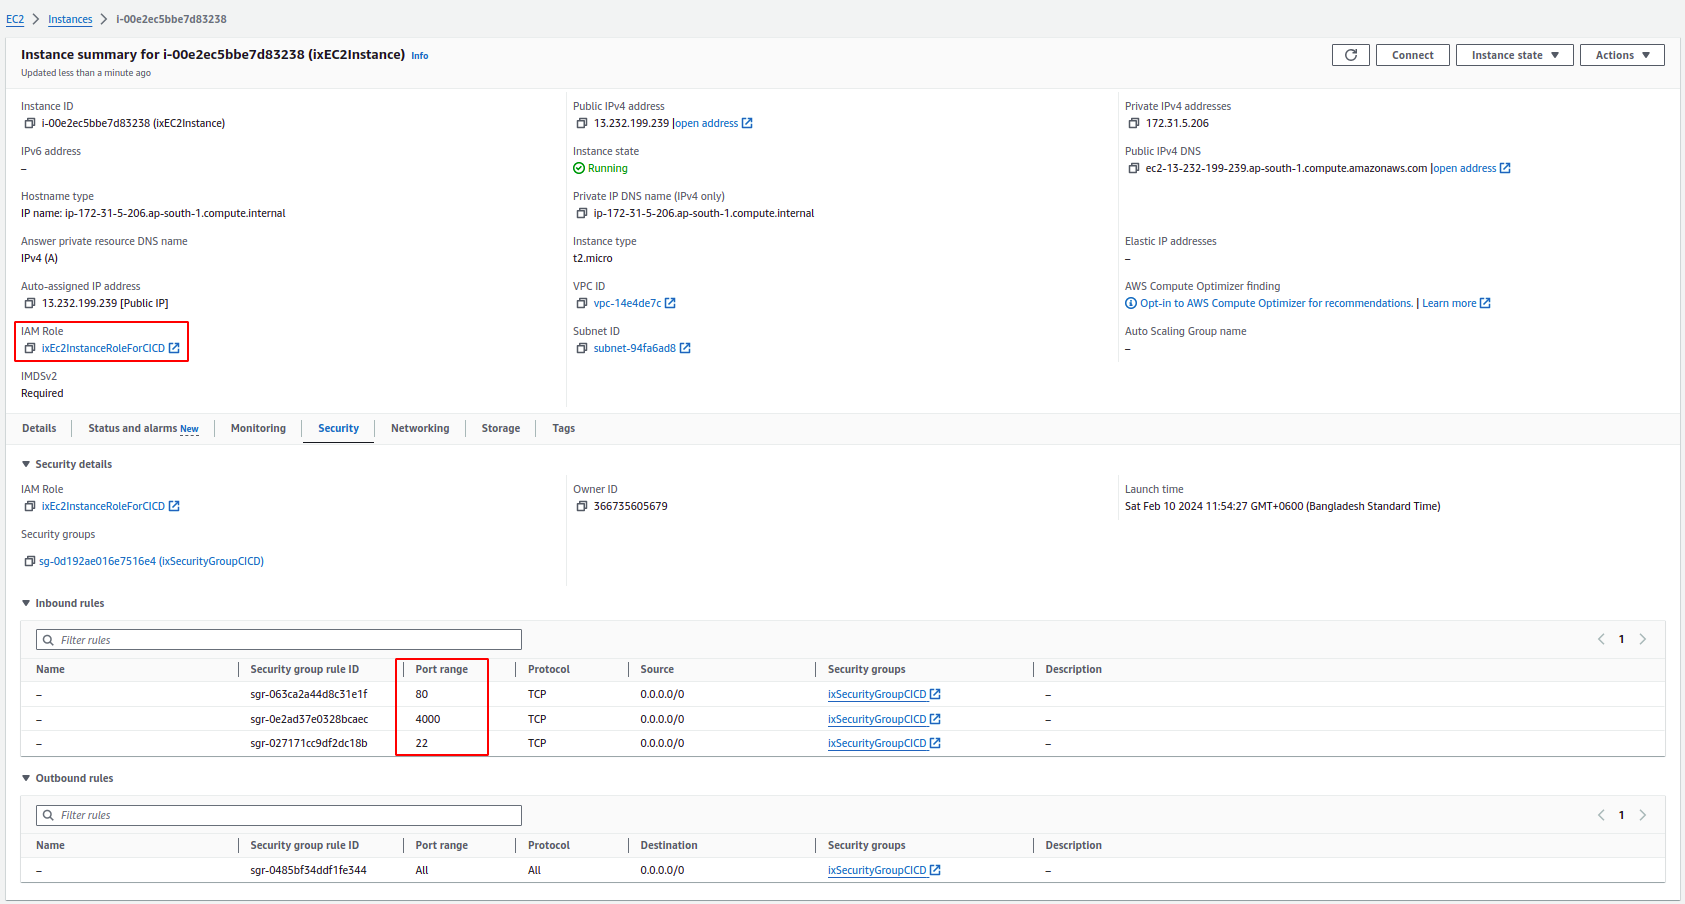
Launch EC2 Instance
Go to the EC2 dashboard and launch an Ubuntu instance with the following configurations:
- Provide a name, which will be used as a tag for deploying code later.
- Choose
Ubuntuas the OS. - Select the existing created security group.
- Open the
Advanced Detailsand put the following bash script as user data. - Open the
Advanced Detailsattach the IAM role under the IAM Profile Section - This script will install the
CodeDeploy Agent,Node.js,npm, andpm2. - Double-check and launch the instance.
User Data
#!/bin/bash

# Install prerequisites
sudo apt-get update
sudo apt-get install -y ruby wget nodejs npm

# Download and install the CodeDeploy agent
wget https://aws-codedeploy-us-west-2.s3.amazonaws.com/latest/install
chmod +x ./install
sudo ./install auto

# Start the CodeDeploy agent
sudo service codedeploy-agent start

sudo npm install -g n
sudo n latest
sudo npm i -g pm2
Now, to verify if the CodeDeploy is installed and running, SSH to the server and run the following command:
systemctl status codedeploy-agentTo verify if Node.js is running:
node -vTo verify pm2 is installed,
pm2 -v
Also, verify the IAM role and security group are attached.
Make a Simple Node.js Server with CI/CD Hooks
A sample code can be found on GitHub.
About the codebase:
- A simple node app, running on port 4000 (We already opened it using the security group).
- Inside the
deploydirectory, we added a few lifecycle events, which can be easily extended over time. - In our
CodeBuild, we will run thebuildspec.ymlfile. - In our
CodeDeploy, we will run theappspec.ymlfile.
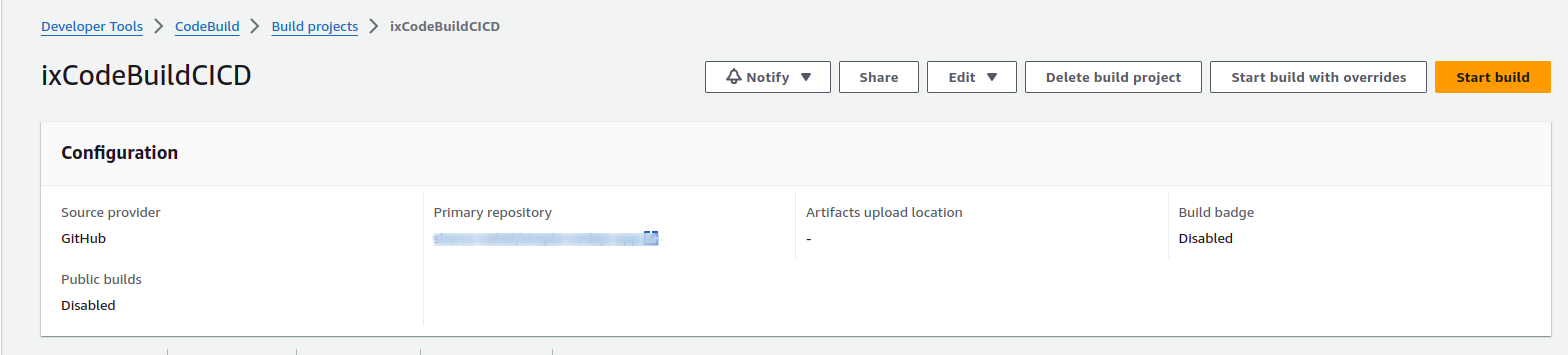
CodeBuild
Set up the git repository as the source. For a public repo, just paste the repository URL, while for a private repository, connect with GitHub and after allowing from GitHub, select the repository.
- Open the
CodeBuilddashboard. - Create a
CodeBuildproject.
While creating the CodeBuild project, use the following configuration for our application:
- Use
GitHubas theSource Provider. - For a
Public Repository, directly paste the repo URL. - For a
Private Repository, first connect, and then select the repository.
For the CodeBuild environment:
- Use
Ubuntu OS. - Use
Standard. - Choose the latest image
aws/codebuild/standard:7.0.
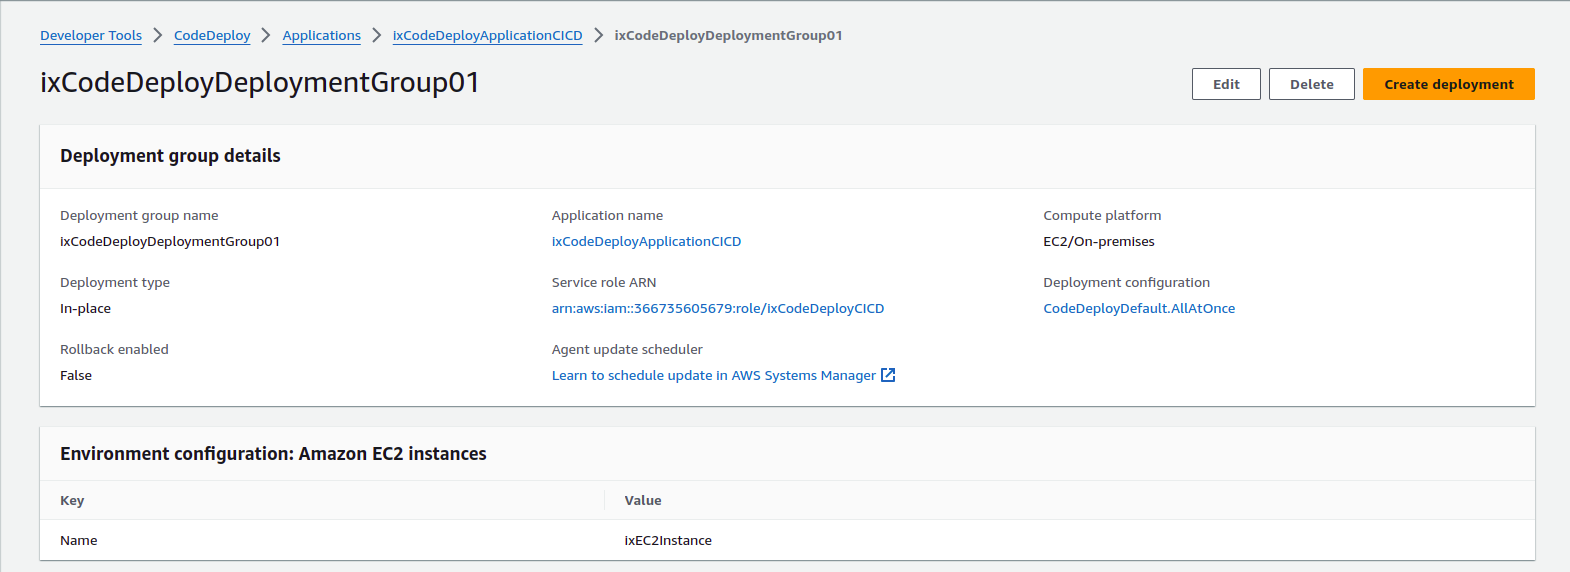
CodeDeploy
Create a CodeDeploy application:
- Open the
CodeDeploydashboard. - Create an
Application. - As the compute platform, select
EC2/On-premisesas we are deploying to EC2 instances.

Create a CodeDeploy deployment group:
- Add the service role we created earlier.
- As the environment, select
Amazon EC2 Instances. - Use “Name” as the key, and for the value, put the name of the instance.
- For a single instance, we do not need the load balancer, so untick “Enable Load Balancer”.
CodePipeline
Go to the CodePipeline dashboard and create a pipeline.
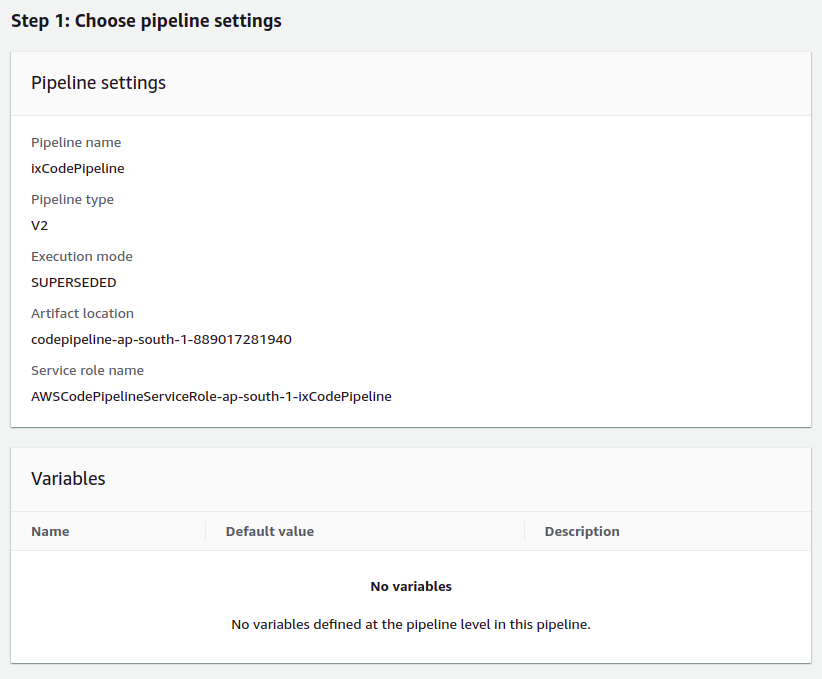
Choose Pipeline Settings:
- Provide a pipeline name and keep the default settings; no changes are required.
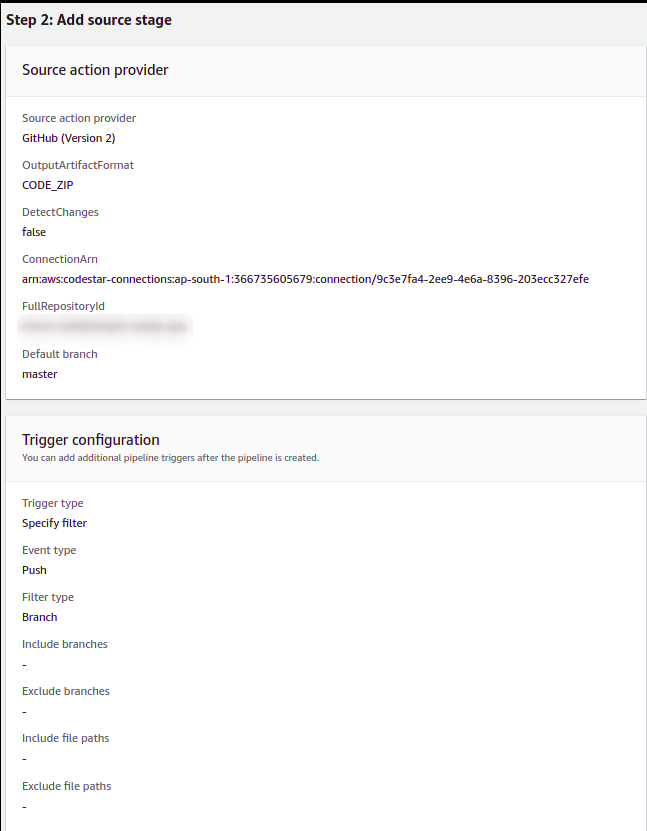
Add Source Stage:
- As the service provider, select
GitHub (Version 2). - Connect your GitHub account and select the repository.
- Select the branch that will be deployed.
- Also, select the branch that will trigger the CodePipeline.
- As trigger, we will skip any filter
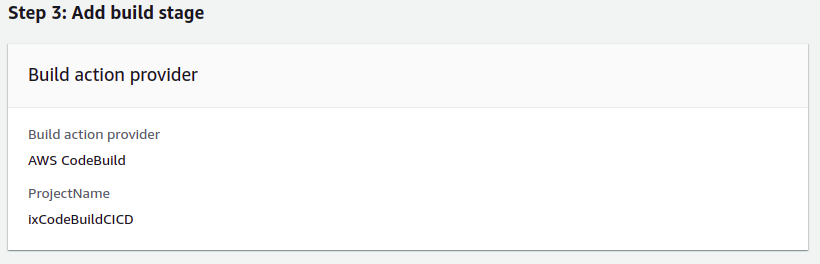
Add Build Stage:
- Select
AWS CodeBuildas the build provider. - From the dropdown, select the CodeBuild project we created earlier.
Add Deploy Stage:
- As the deploy provider, select
AWS CodeDeploy. - Select the CodeDeploy application name and also the CodeDeploy application deployment group; we created these earlier.

Troubleshooting
Update Build Artifact
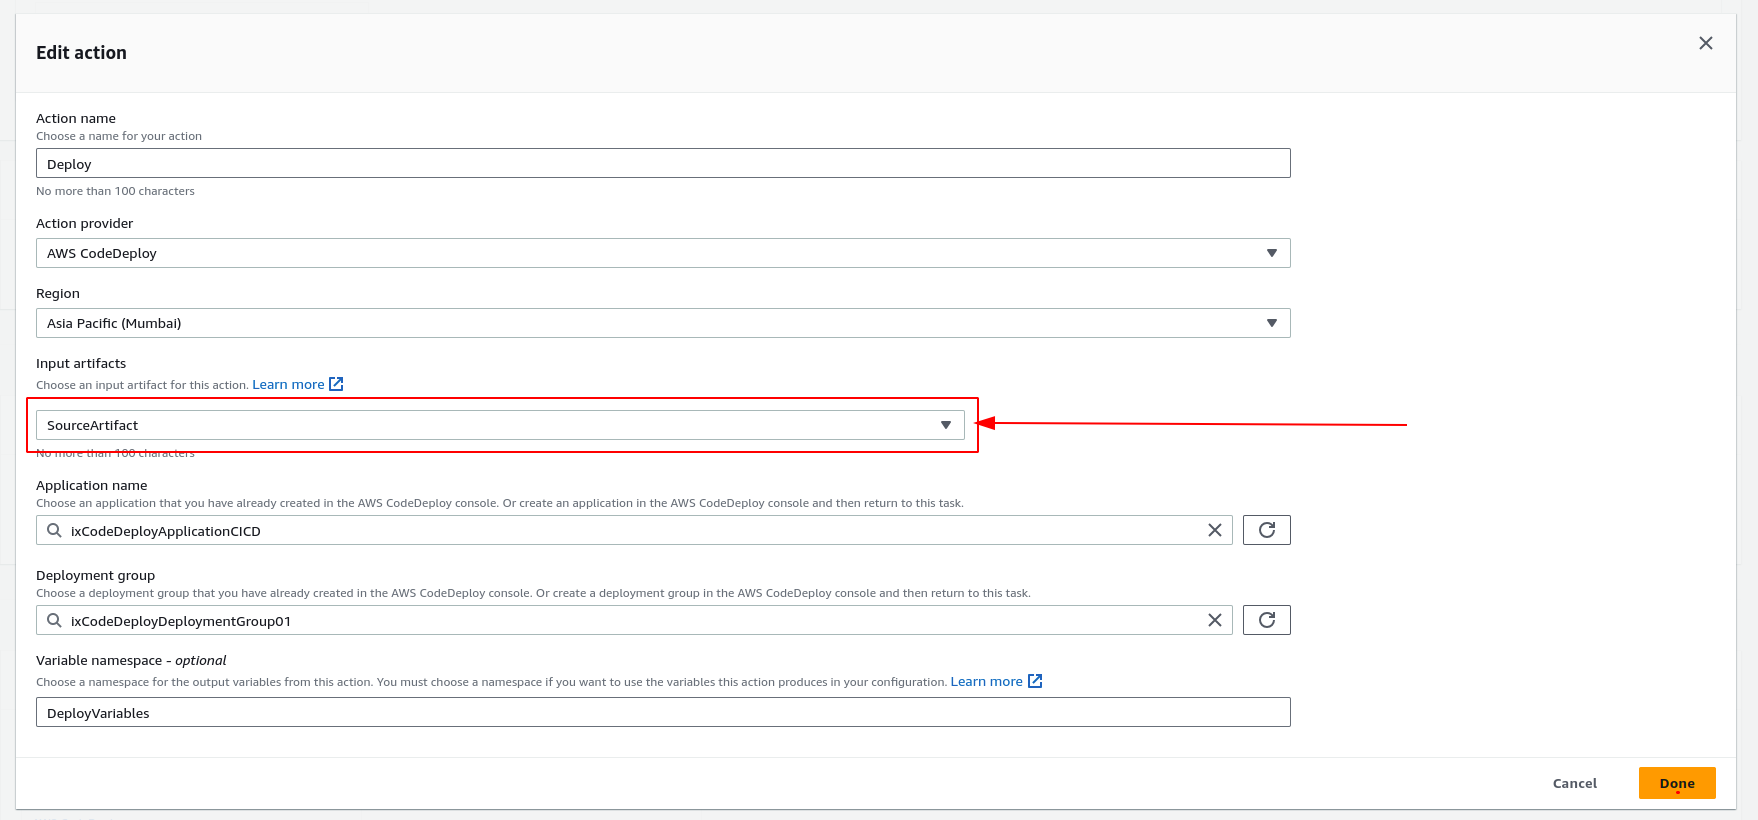
The CodeDeploy should use the output of CodeBuild as the source. To do so:
- Select the created CodePipeline and edit it.
- Edit the deployment stage.
- From
Edit Actionof the CodeDeploy stage, change theInput ArtifactstoSourceArtifact. - Select
Done, and also save the CodePipeline changes.
Now, in the CodeDeploy stage, select “Retry stage” or from the top of the CodePipeline, “Release change”.
Reboot the Instance
Double-check the IAM Role and security groups of the instance. Reboot the instance if you attach the IAM role later.
Update Code Deploy Config
Make sure, the code deploy has the correct configuration, especially the IAM role is attached. Edit the configuration with the updated IAM role in case of pipeline failure.
Check the Application
Find your instances, and in the browser, go to http://public_ip_of_the_instance:4000, and the application should be up and running.
Additionally, change the code in the repository, and it should automatically trigger the CodePipeline and also deploy the code to the server.
Feel free to let me know of any queries and best wishes for your cloud journey.
Experience the iXora Solution difference as your trusted offshore software development partner. We’re here to empower your vision with dedicated, extended, and remote software development teams. Our agile processes and tailored software development services optimize your projects, ensuring efficiency and success. At iXora Solution, we thrive in a dynamic team culture and experience innovation in custom-made software development.
Have specific project requirements? Personalized or customized software solutions! You can contact iXora Solution expert teams for any consultation or coordination from here. We are committed to maximizing your business growth with our expertise as a custom software development and offshore solutions provider. Let’s make your goals a reality.
Thanks for your patience!
Add a Comment